 By Audrey Hayes
Updated November 2026
A table for DEWALT table saw gives you a flat, rigid work surface with proper outfeed support, a stable mounting point and room for the materials you actually cut. In this guide you will learn how to pick the right approach for your shop, measure and cut the parts, assemble a sturdy frame, and dial in the table so your saw cuts square and safe. The plans below are sized for the common job-site and home-shop DEWALT 10-inch contractor and jobsite saws, but the principles apply to most portable saws.
Why a Dedicated Table Matters for Your DEWALT Saw
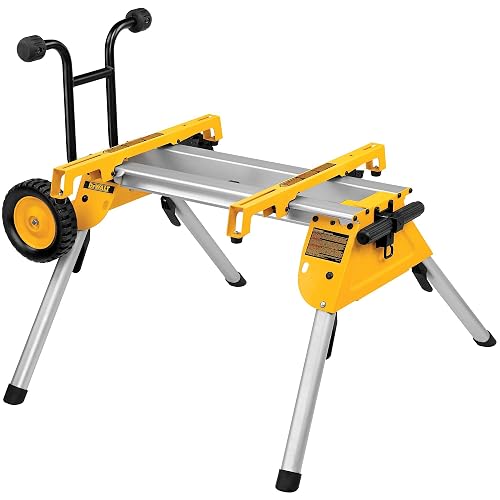
Most portable table saws ship with a thin stamped or cast top that flexes under heavy plywood and offers little support past the blade. Flex changes the relationship between the blade and the miter slots, and that is where cuts start to drift. A dedicated table, whether it is a full cabinet or a folding stand with an added top, solves three problems at once: it keeps the saw top flat, it gives you a wide outfeed surface, and it holds the saw at a comfortable working height. If you are still deciding between a commercial stand and a custom build, our overview of 5 Best Dewalt Table Saw Stand Options for Job Site and Home Shops (2026) compares ready-made options side by side.
Shopping for one? See our guide: 5 Best DEWALT 10in Table Saw Options for Woodworkers (2026).
Choose Your Approach: Build, Buy or Modify
You have three realistic routes, and the right one depends on how often you use the saw, how much space you have and how much time you want to spend in the shop.
- Build from scratch: Best if you want exact dimensions, extra storage and a top sized for your largest sheet goods.
- Buy a stand or combo: Best if you need a job-site setup that folds up quickly or you want a tested, ready-to-use base. Our guide to 7 Best Table Saw and Stand Combos for Jobsite and Home Shops (2026) covers the main choices.
- Modify an existing table: Best if you already have a bench or cabinet and only need to add a wing, outfeed extension or a flatter top.
Materials and Tools You Will Need
For a simple, rigid build you will want the following. Quantities assume a top roughly 27 by 48 inches with a 20-inch outfeed wing.
- One 3/4-inch sheet of plywood or MDF for the top, at least 24 by 48 inches
- 2×4 lumber for the base frame and leg rails
- Four heavy-duty leveling feet or adjustable casters
- Wood glue, 2-1/2-inch and 1-1/4-inch wood screws
- A combination square, tape measure and marking knife
- A drill/driver, circular saw or track saw for breakdown
- Clamps, a straightedge and a machinist’s square for checking
Step 1: Measure Your Saw and Plan the Top
Before you cut anything, measure the footprint of your saw’s base and the exact height of the cast-iron or aluminum table. Mark the position of the blade, the miter slots and the front rail. Your top should extend at least 12 to 16 inches beyond the blade on the right side for outfeed support and leave enough clearance on the left for the rip fence rails to slide freely.
Sub-step: Sketch a Cut List
- Draw the top at full size on graph paper or in a CAD program.
- Mark the saw opening so it sits flush with the saw’s cutouts.
- Add a 1/8-inch allowance on all sides for trimming and expansion.
- Write each part with its length, width, quantity and material.
Step 2: Cut the Parts Accurately
Accuracy at this stage saves hours of shimming later. Cut the plywood top with a track saw or a circular saw guided by a straightedge, and keep the factory edge reference for the fence side. Rip the 2×4 frame members to width on the saw itself so they are parallel. Label every part as you go.
| Part | Material | Quantity | Dimensions |
|---|---|---|---|
| Top | 3/4-inch plywood | 1 | 27 x 48 in, with saw cutout |
| Outfeed wing | 3/4-inch plywood | 1 | 20 x 27 in |
| Long rails | 2×4 | 2 | 46 in |
| Short rails | 2×4 | 2 | 24 in |
| Legs | 2×4 | 4 | 32 in, trimmed to height |
| Cross braces | 2×4 | 2 | 22 in |
Step 3: Assemble the Base Frame
Build the base as two rectangular frames, one at the top and one near the floor, then connect them with the legs. Use glue and two screws at each joint, and pre-drill to prevent splitting. Square each frame by measuring corner to corner. The two diagonal measurements should match within 1/16 inch before you move on.
Sub-step: Add Diagonal Bracing
Diagonal braces stop racking when you push heavy stock across the top. Cut them from 2×4 stock at a 45-degree angle and fasten them into the inside corners of each leg assembly.
Step 4: Mount the Top and Set the Saw
Attach the top to the frame with screws driven up from below, using slotted holes or oversized holes so the wood can move seasonally. Set the saw into the cutout and check that the table surface is flush with the saw’s top within about 1/32 inch. Use shims under the saw’s feet if needed, and tighten the saw’s mounting bolts evenly.
Step 5: Align the Blade, Fence and Miter Slots
This is the step that decides whether the table actually cuts well. Follow the saw’s own manual for adjustment points, since the procedure varies by model. In general:
- Raise the blade to full height and check that it is parallel to the miter slot using a dial indicator or a combination square against the slot.
- Adjust the trunnion or alignment screws until the blade sits parallel to the slot within about 0.002 to 0.005 inch.
- Set the rip fence parallel to the blade, measuring front and back with the same gauge.
- Recheck after tightening, since adjustments can shift.
If the saw’s manual gives tolerance figures, follow those over any general number in this guide.
Step 6: Add Outfeed Support and Storage
Attach the outfeed wing flush with the top, using a straightedge to keep it level. A shelf or drawer under the top adds storage for blades, wrenches and push sticks. Keep these items within reach but out of the path of the blade.
Common Mistakes to Avoid
- Skipping the square check: A frame that is not square will make the top twist, and that puts the saw out of alignment.
- Screwing the top down tight: Plywood moves with humidity. Use elongated holes so it can expand without cracking.
- Making the top too narrow: If the outfeed is short, long boards will tip and pull the cut off line.
- Ignoring the saw’s own alignment procedure: A beautiful table will not fix a blade that is out of parallel.
- Building the stand too tall: Measure your own height and the saw’s table height before you cut the legs.
Tips for a Better Result
- Seal the top with a thin coat of paste wax or a dedicated table saw top finish so stock slides smoothly.
- Check the top for flatness with a straightedge after every major step.
- Keep a set of push sticks and a push block at the saw for safe feeding.
- If you cut sheet goods often, plan the table width to support a full 4-by-8 panel as an outfeed or a second wing. Our overview of Cutting Wood Safely: Saws, Kickback and Guards explains why support and guards matter for safe ripping.
Recommended gear
These items help with the build and the alignment checks described above.
- A dial indicator with a magnetic base: It lets you measure blade-to-slot parallelism to fractions of a thousandth of an inch, which is far more precise than a square alone. View on Amazon
- A quality combination square: Useful for checking square on the frame and the blade height at the same time. View on Amazon
- A track saw with a guide rail: Gives you clean, straight cuts on the plywood top without a wobbling circular saw. View on Amazon
- Adjustable leveling feet: Help you bring a wobbly stand to flat on an uneven shop floor. View on Amazon
FAQ
What is the best material for the top of a table for DEWALT table saw?
Three-quarter-inch plywood or MDF is the most common choice because both stay flat and take a low-friction finish. Plywood is more stable against humidity changes, while MDF is smoother but can swell if it gets wet.
How big should the outfeed support be?
Aim for at least 12 to 16 inches past the blade on the right side, and more if you regularly rip long boards. A wing that supports a full 4-foot panel is ideal for sheet goods.
Do I need to align the saw after building a table?
Yes. Even a well-built table can shift the saw if the mounting is uneven. Check blade-to-slot parallelism and fence alignment after the top is attached and again after a few weeks of use.
Can I use this approach for any portable table saw?
The general method works for most portable saws, but you must measure your saw’s footprint, mounting points and table height. Always follow the manufacturer’s alignment procedure in the owner’s manual.
How do I keep the top from warping?
Store the plywood flat, seal both faces with finish, and avoid mounting the top with screws driven tight through the surface. Keep the shop at a stable humidity.
Is a commercial stand better than building my own?
A commercial stand saves time and offers a tested design, while a custom build lets you size the top and add storage. Choose based on how much you want to build and how often the saw will move.
Should I consult a professional for electrical or safety setup?
If your shop wiring, dust collection or saw guard setup is unclear, consult a qualified electrician or a woodworking safety instructor before you run the saw at full capacity.
Conclusion
A well-built table for DEWALT table saw gives you a flat, stable surface, real outfeed support and a saw that cuts square. Plan your top carefully, cut parts accurately, and take the time to align the blade and fence to the saw’s own tolerances. Once the table is set up, it will serve your shop for years.
Ready to choose one?
About Audrey Hayes
Audrey Hayes is part of our editorial team and reviews and edits our woodworking guides, checking product details against manufacturer specifications and owner feedback.