By Audrey Hayes
Updated November 2026
The most important tools for woodworking fall into a few clear groups: tools that measure, tools that mark, tools that cut, tools that shape and smooth, and tools that hold your work together. This guide walks through eight essentials, explains what each one does in the shop, and shows you how to use them safely so you can start building projects with confidence.
How to Think About Your First Shop Tools
Before you buy anything, it helps to understand what a woodworking shop actually needs to do. Almost every project comes down to four jobs: getting accurate dimensions, cutting pieces to size, joining them, and finishing the surface. The most important tools for woodworking are the ones that handle these jobs reliably. You do not need a full machine shop to start. You do need a few tools that you trust.
Shopping for one? See our guide: The Long Dark Woodworking Tools: 3 Best Picks for Long Reach Work (2026).
Many beginners make the mistake of buying a long list of specialty tools before they have mastered the basics. A better approach is to build a small set of core tools, practice on simple projects like a basic box or a birdhouse with a cut list, and add tools as your projects demand them. For a broader look at purchasing order, see Woodworking Tools for Beginners: What to Buy First.
1. Measuring and Marking Tools
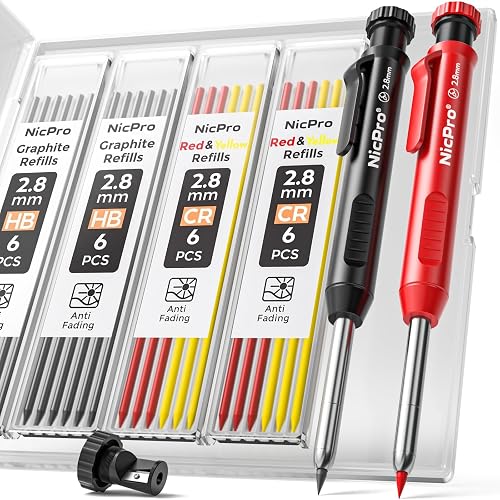
Accuracy starts with measurement. A cut that is off by 1/32 inch can make a joint gap or a drawer stick. Your core measuring kit should include a steel rule, a combination square, a tape measure, and a marking knife or sharp pencil.
What to Look For
- A steel rule graduated to 1/64 inch for fine layout work.
- A combination square with a hardened blade that stays square to the head when you check it against a known straight edge.
- A marking knife, which leaves a fine line that a saw can start in, unlike a pencil line that wanders.
- A tape measure for rough dimensions on lumber, not for finished parts.
For a deeper breakdown of these instruments, read Woodworking Measuring Tools: Rules, Tapes and Squares.
2. Hand Saws for Accurate Cuts
A good hand saw is one of the most versatile tools you will own. A crosscut saw with 8 to 10 teeth per inch cuts across the grain, while a rip saw with about 5 to 7 teeth per inch cuts along it. A back saw with a stiffening spine is the standard choice for joinery, because it cuts thin, straight kerfs for dovetails and tenons.
Keep your saws sharp and set correctly. Dull teeth wander and force you to push harder, which is how hands get hurt.
3. A Power Saw for Breaking Down Stock
Hand sawing a full sheet of plywood or a long board is slow work. A table saw is the machine most woodworkers rely on for ripping and crosscutting with repeatable accuracy. A circular saw with a guide rail is a practical alternative when space or budget is tight.
Whatever you use, follow these safety habits:
- Wear eye and hearing protection every time the blade spins.
- Keep the blade guard in place and use a push stick when the work gets narrow.
- Never reach over a running blade or stand directly behind the path of a kickback.
- Unplug the machine before changing blades or clearing jams.
Learn the machine’s operating manual and its specific safety features before your first cut. For a fuller overview of machines and their safe use, see Woodworking Power Tools: What Each Does and Safety Basics.
4. A Chisel Set for Cleanup and Joinery
Chisels handle the work that saws and routers cannot: paring a tenon to fit, cleaning out a mortise, or trimming a dovetail. A set of bench chisels in 1/4, 1/2, 3/4 and 1 inch widths covers most joinery tasks.
Chisel Tips
- Keep the edge razor sharp. A sharp chisel takes thin shavings and needs less force.
- Always pare with the grain direction in mind. Cutting against it causes tear-out.
- Use a mallet for heavy removal and hand pressure for finishing cuts.
5. Planes for Flattening and Smoothing
A hand plane, or a thickness planer and jointer if you have them, is how you turn rough lumber into flat, square stock. Flatten one face, joint one edge square to it, then bring the rest to parallel. This sequence matters, because every later measurement depends on it.
A block plane is handy for end grain and small trimming, while a jack plane handles general flattening. Set the blade for a fine shaving, and check that the sole stays flat against a known reference.
6. Drill and Driver for Holes and Fasteners
A cordless drill/driver does more than drive screws. It bores pilot holes, counterbores screw heads, and with the right bit, drills accurate mortises. Match the pilot hole to the screw’s shank and thread size to avoid splitting hardwood. Pair the drill with a drill guide or drill press when you need holes at exact angles.
7. Clamps for Holding Work Together
Clamps are the most underrated tools in the shop. You cannot glue up a panel, assemble a carcass or hold a workpiece on the bench without them. Start with a set of bar clamps or parallel clamps in several lengths, plus a few F-style clamps for smaller work.
- Use enough clamps to apply even pressure along the length of the joint.
- Protect the wood with pads or scrap so the clamp jaws do not dent the surface.
- Check that the assembly stays square while the glue cures.
8. Sanders and Abrasives for Finishing
A random orbit sander with a 5-inch pad handles most flat surfaces. Work through the grits in order, usually 120, then 150, then 180 or 220 for most projects. Skipping grits leaves scratches that show up after finishing.
For detail work and edges, sanding blocks and a few sheets of fine paper do the job. Sand with the grain, and wipe away dust between grits so coarse particles do not scratch the next pass.
Common Mistakes
- Buying too many tools at once. Learn the core set first, then add tools as projects call for them.
- Trusting an out-of-square square. Check your combination square against a known straight edge before relying on it.
- Ignoring blade and bit sharpness. Dull edges cause tear-out, burn marks and dangerous slips.
- Skipping safety gear. Eye, ear and dust protection are non-negotiable.
- Rushing glue-ups. Clamp pressure and cure time both matter, so give the joint time to set.
Recommended gear
A few well-regarded products can make the essentials easier to use. Choose ones that suit your shop size and budget.
- Starrett combination square is a long-established precision square that many woodworkers use for layout checks, and it is a sound choice for accurate marking. View on Amazon
- DeWalt 20V MAX cordless drill/driver is a common shop-friendly drill that handles pilot holes and driving screws across most beginner projects. View on Amazon
- Bessey parallel clamps are a popular choice for glue-ups and panel work because the jaws stay parallel under pressure. View on Amazon
- Festool random orbit sander is a premium option often chosen for its dust extraction and finish quality on flat stock. View on Amazon
Tips for Building Your Shop Gradually
Plan your first few projects, then list the tools each one requires. A simple project like a small box needs a square, a saw, a chisel, clamps and sandpaper. Write the list, buy only what you are missing, and practice until each tool feels natural. For more project-based buying ideas, check Woodworking Essential Power Tools: 7 Machines to Build Your Shop (2026) and Woodworking Hand Tools Only: A Step-by-Step Guide to Building Without Power.
If you prefer working with hand tools, you can build a capable shop with a surprisingly small kit. Many experienced makers started exactly that way, and the skills transfer directly to power tools later.
FAQ
What is the single most important tool for woodworking?
There is no single answer, but a reliable square is arguably the most important, because accurate layout drives every other step. A bench, clamps and a sharp saw come close behind.
Do I need power tools to start woodworking?
No. Many people build furniture using only hand tools. Power tools speed up repetitive work, but the core skills of measuring, sawing, chiseling and planing apply to both approaches.
How many clamps do I need?
Most beginners start with four to six clamps in mixed lengths. You will want more for larger glue-ups, so add them as your projects grow.
What grit sandpaper should I start with?
For rough stock, 120 grit is a common starting point. Move through 150 and 180 or 220 before finishing, and avoid skipping grits.
How do I keep my tools safe and accurate?
Store them dry, keep edges sharp, and check squares and rules against a known reference. Read each tool’s manual and wear the right protective gear every time.
Should I buy used tools?
Used tools can be a good value if they are in sound condition. Inspect them for rust, cracks and warped surfaces, and test them before committing. For guidance, see Used Woodworking Tools for Sale: A Buyer's Guide to Smart Shopping (2026).
Where can I learn to use these tools safely?
Start with the manufacturer’s instructions, then consider a local woodworking class or guild. Check the organization’s official website for current schedules and details, and call ahead to confirm availability.
Conclusion
The most important tools for woodworking are the ones that measure accurately, cut cleanly, shape and smooth your stock, and hold everything together while it dries. Build a core set of these essentials, practice them on simple projects, and expand your shop as your skills and projects grow. Always wear proper safety gear, and when in doubt about a machine or technique, consult an experienced woodworker or the tool manufacturer.
Ready to choose one?
About Audrey Hayes
Audrey Hayes is part of our editorial team and reviews and edits our woodworking guides, checking product details against manufacturer specifications and owner feedback.